Add a Client in Xeppo
Clients can be created in Xeppo where they do not exist in a source system. There are a few ways this can be achieved:
- Adding a Client to an existing Client Group
- Adding a Client that does not belong to an existing Client Group
- Xeppo creates a Client when a Lead is Qualified
A Client, also known as a Member of a Group, can be an Individual, Company, Partnership, Trust, Super Fund or 'Other' entity. Every Client within Xeppo exists within a Group There may be one or multiple Clients in a Group.
It is important to understand that User Roles and Security Permissions for Xeppo are set by your Practice Admin. This may restrict certain functionality, for example, the areas or Xeppo that a user can access, abilities to edit Client details, and/or access to specific Clients. For any queries regarding permissions, please speak to your Practice Admin.
Creating a Client within an existing Group
When you create a new Client from within an existing Group, the new Client will become a Member of the Group.
To create the Client, go to the Client Group you want to add the Client Record against. Select Members > Create Client.
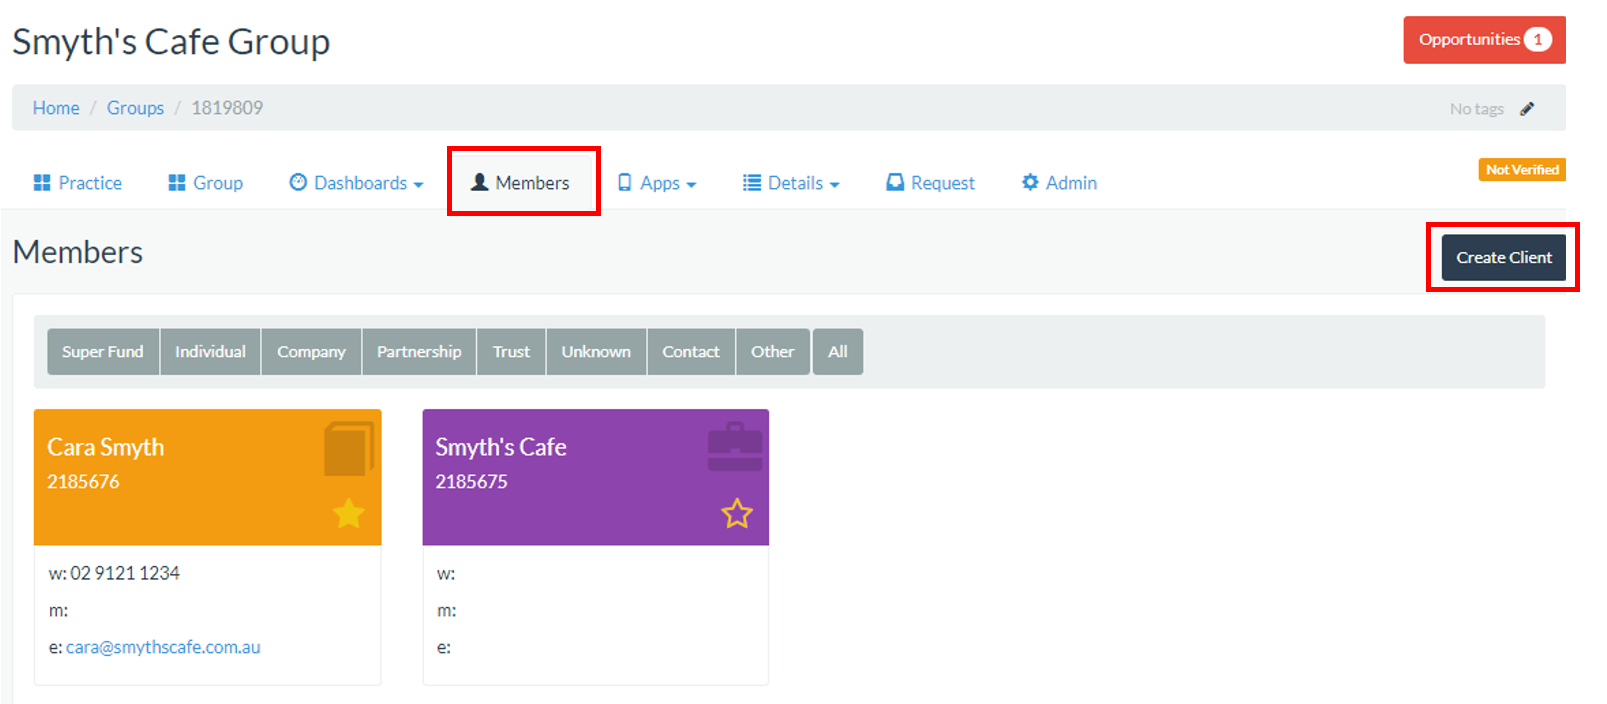
Complete the client details, then click the Create button.
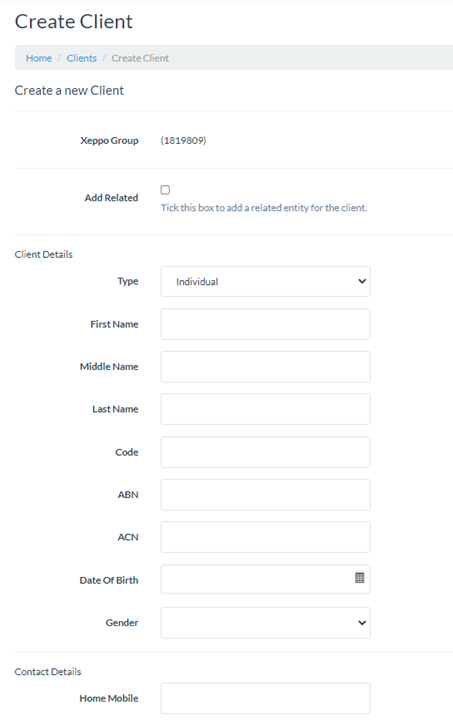
When created, the Client will have the status of Active. Additional Client information can be added to the record later as needed.
Creating a Client that does not belong to an existing Group
By creating a Client outside of an existing Group, Xeppo will automatically create a Client Group of the same name as the Client you have created.
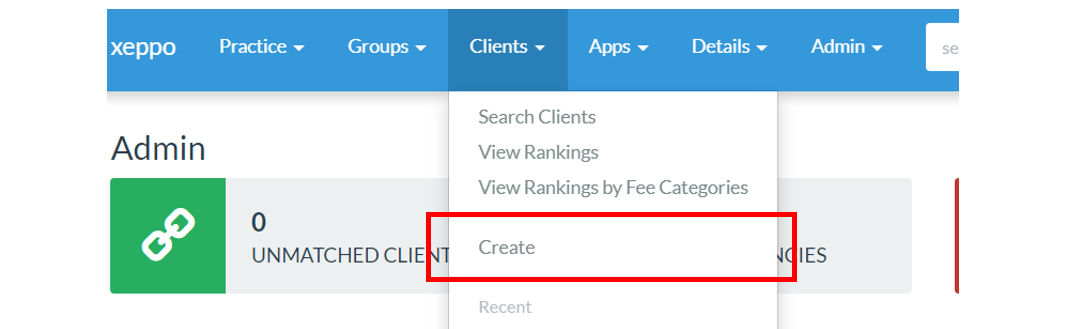
To create the client, from the top menu, go to Client > Create. Complete the client details, the same as the previous example. Click the Create button.
When created, the Client will have the status of Active. Any details not available or entered at the time of creation can be be added at a later point in time.
Editing a Client in Xeppo
There are several ways to edit Client details in Xeppo. Below is an overview on how to update some of the key areas in a Clients record. You will need to be in the Clients record to make the update.
Key Firm Contacts and Related Clients
Within a Client Record you can add Key Firm Contacts and Related Clients right hand panel as shown. Click Create next to the applicable item you wish to update. For more information see Managing Key Firm Contacts against Clients and Relationships.

Client Details
Within the Client record go to Admin > Client. From here you can update key information such as:
- Client Status
Active, Inactive or Prospect - Client Details
Name, date of birth, ABN/ACN, etc - Contact Details
Phone and email details for home and work - Address Details
Street, business, postal, etc

Select Save to apply the changes. If the Client is the Primary Contact for the Group, this is indicated by a solid gold star. You can easily distinguish who the Primary Contact is for a Group from the Members tab within a Group. For more information, see Primary Contacts.
Insurance Policies
To add insurance against the Client go to Details > Insurance. For more information on the process, see Managing Insurance Policies against Clients.
Change Requests & Data Sync
Where you have added or edited a Client record in Xeppo, you can use Change Requests and Data Sync (if enabled) to easily keep your source systems up to date. For more information on Change Requests and Data Sync, see Creating a Change Request and Data Sync.
Xeppo creating a Client when a Lead is Qualified
When a Lead is Qualified within the Xeppo Sales App, a Client and Client Group will be created by Xeppo. This process may result in more than one Client being created within a Group. For example, if the Lead that was Qualified, was for a Company, Client records would be created for both the Company, and the Contact you had for the lead. The Client(s) will have the status of Prospect against them. The status may change to Active or Inactive at a later date, pending the creation of an Opportunity and sales pipeline outcome, plus any manual changes to status that are applied.
For more information on the Sales App see Creating & Qualifying Leads and Webinar: Sales App.
Comments
Article is closed for comments.